OpenKiosk
A remotely configurable secure public browser terminal.
Prerequisites
Install Debian 13 (trixie)
To convert your hardware into a public browser you must first install Debian 13 Linux
on a spare or new x86_64 or aarch64 device and user account openkiosk must exist on the system.
(Other linux distributions will be supported in the future)
Steps
- Download the ISO for your hardware (amd64 or arm64)
- Create a bootable usb image
- Boot your device from the usb stick
- Follow the Debian Install Guide
- When installation is complete, remove the usb and reboot
Raspberry Pi 5 Install
After installing the Debian 13 image, ensure you create user account openkiosk when prompted at system initialization.
Install OpenKiosk
Latest release: 151.0.4 Beta
Steps for x86_64 PC (amd64)
- Wait for new Debian installation to finish rebooting
- Ignore the Gnome login screen
- Immediately open a terminal using Ctrl+Alt+F2 (fn) keys
- Login as user root using the password you set at install time
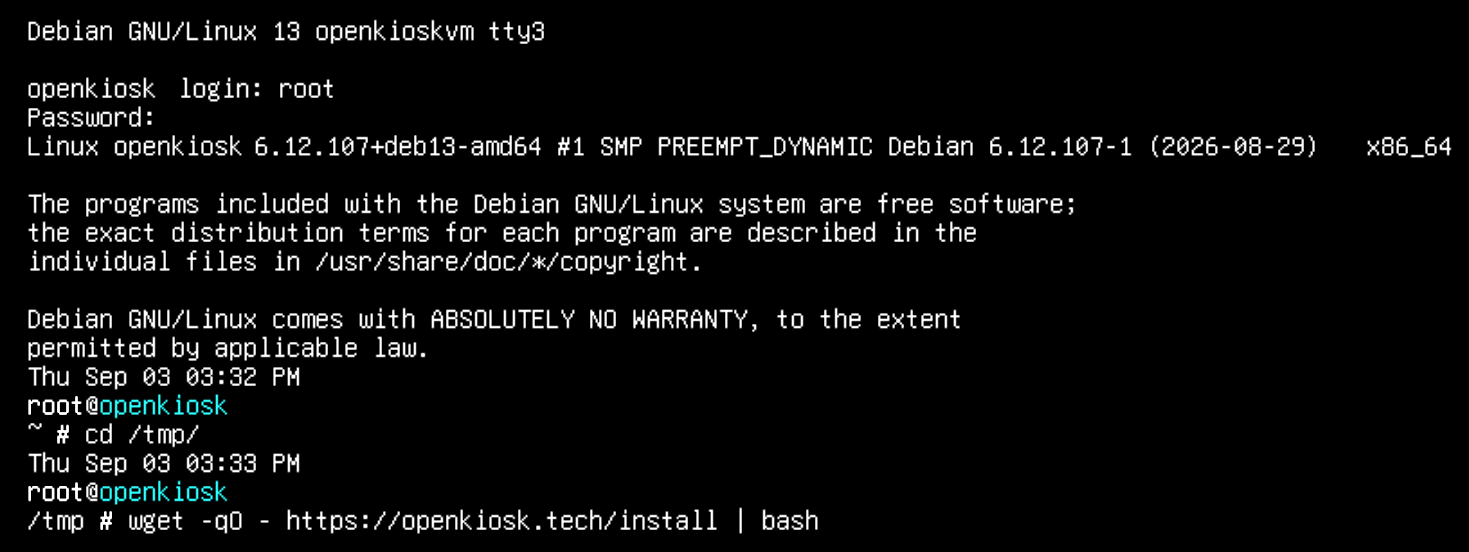
- Enter the command below. Note: -qO is "q" and letter "O" not zero.
User root
wget -qO - https://openkiosk.tech/install | bashOn Raspberry Pi 5 (arm64)
- Open a terminal
- Enter the same command below
- The install script will prompt for sudo password
User openkiosk
wget -qO - ttps://openkiosk.tech/install | bashDownload and Install
Piper TTS Package
After OpenKiosk downloads and finishes installing, you will be prompted to install PiperTTS Text to Speech package. It is a 555M download and is recommended for audio narration of website content. Press "Y" and then enter to install. The supported spoken languages OpenKiosk ships with are: da, de, en-US, es-ES, fr, it.

Remote Management
Next you will be prompted to generate a new token to enable remote management. If you intend to manage one or more devices from the internet, Press "Y" and then enter. If you wish to manage OpenKiosk locally from the machine only, enter "n". Remote management can always be activated at a later time.

Token File
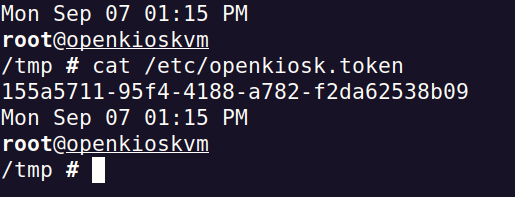
This newly generated token is for the device you want to manage remotely. To manage additional device installations from the same account, you must use this token.
Reboot Device
And finally, you will be prompted to reboot your device. Press "Y" and then enter.

Custom Branding
If you choose to use your own custom branding for the boot screen you will need to add two images at install time.
- custom.svg
- splash.png
Just add these two images as user root with the above names to the /etc directory
and these images will be picked up at installation and used for the custom boot screen. They can be added
at any point, even if OpenKiosk is already installed. The default boot images have been
posted here to use as a
reference when creating the custom images.
These custom images will be automatically picked up if this is the first install or just an update of OpenKiosk.
Getting Started
Now that everything is installed, after reboot completes, your device will automatically load OpenKiosk. You are ready to configure your new public browser.
Accessing Device Settings
There are different ways to access device settings:
- Type
about:openkioskinto the urlbar - Use keyboard shortcut
Shift+F1 (fn)keys - Or javascript Web Controls from an html page
- For touchscreens, press and hold you finger on the screen for 10 seconds
- Manage one or all of your devices with the remote settings web interface
Login Prompt
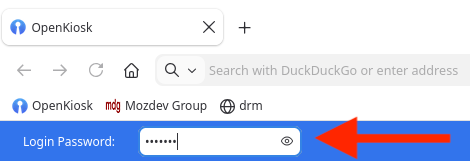
Enter the password you set for user account openkiosk when you installed Debian and press the return key.
Remote Management
Remote management is a new and powerful addition to OpenKiosk.
Access is initialized by generating a token file named openkiosk.token and
placing it in the /etc directory on the device. To manage one or more
devices, generate a single token and use it for every device
you choose to manage. The token is used to initialize device
registration and enable remote management from a web interface
where device settings can be accessed.
Generating a New Token
A token is a universally unique identifier (UUID) saved to a text file.
For your convenience the OpenKiosk distribution includes a script to generate
the openkiosk.token file that is then saved to the system
folder /etc. A new token can be created at installation or any
point you choose to use remote management. When you register a new account,
it is coupled with the token you register with.
Token File
/etc/openkiosk.token
Install Time Token Generation
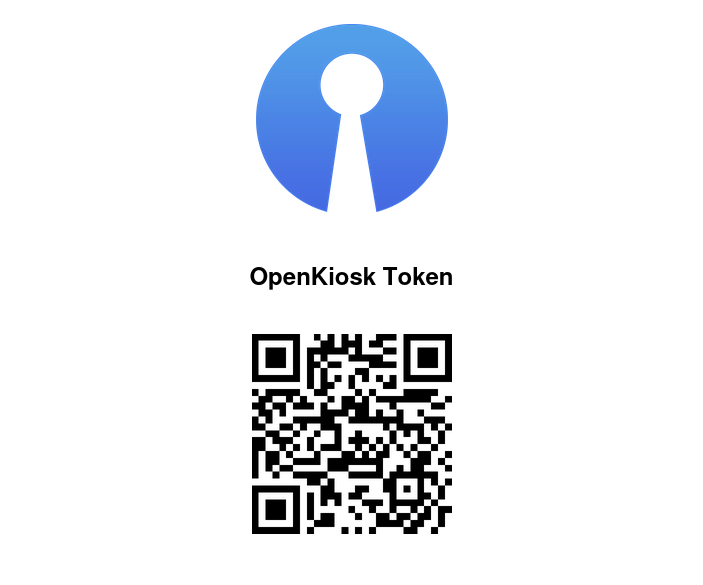
If you chose to generate a new token when installing OpenKiosk, a qr code of the token will be displayed to you in a new browser tab when OpenKiosk starts. Copy this code and save it to create a remote account. You will also need it for any other devices you choose to manage. A link to set up a new account will be displayed.
Manual Token Generation
If you chose not to generate a new token when installing, you can manually generate a new token yourself, log into OpenKiosk Settings, go to System panel and open a terminal.
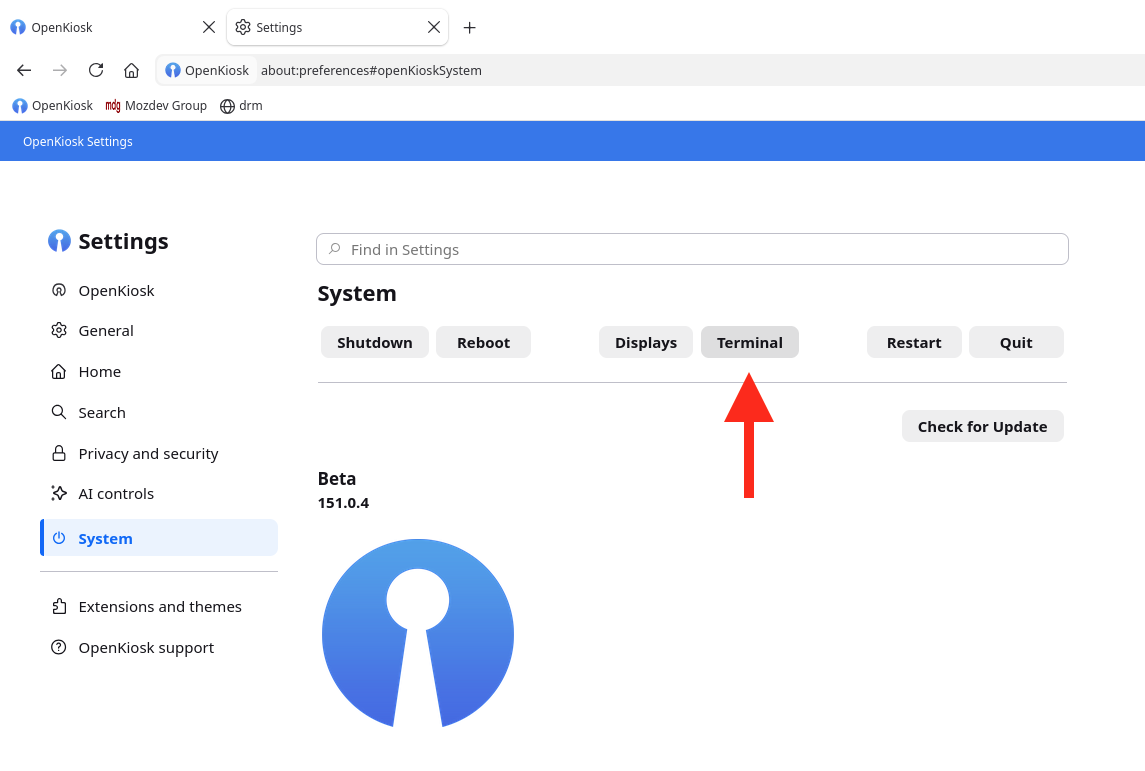
To run the script type: sudo okgentoken into the console.
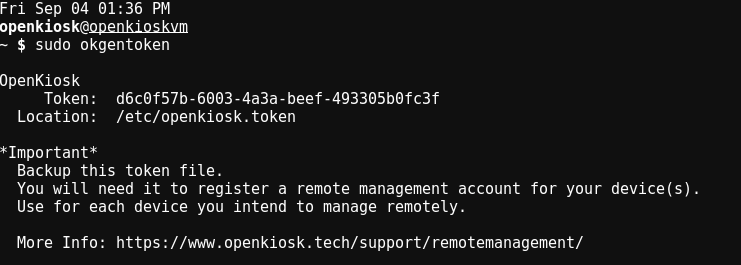
Back up the Token File
If you intend to manage one or more devices, you MUST SAVE this file for use with every device you choose to remotely manage. You can save this file to a usb stick or scp it to another machine. You will need the token file UUID string to create an online remote account. A qr code for the token will be displayed to you when you restart the browser to initialize.
Restart to Initialize Device
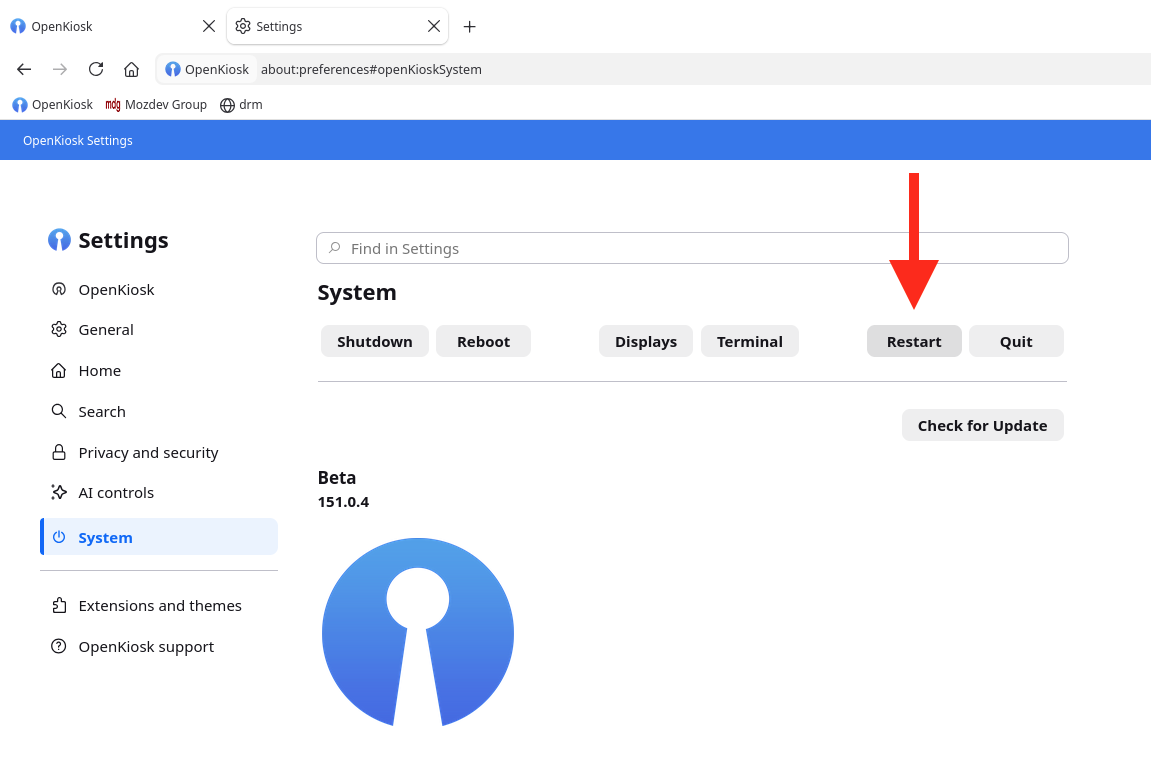
Close the terminal and click the Restart button. After OpenKiosk restarts, it will register itself as a remotely managed device. You can claim your device(s) using the newly generated token. Every device you choose to manage will use this token. After OpenKiosk restarts and successfully registers itself, the token will be automatically removed to secure the device by ensuring it is not copied by anoyone. That's why it is necessary to have a backup on a non-public computer.
Create a Remote Account
After OpenKiosk has restarted, a qr code for the token and a link to register will appear in a new tab. To create a remote account to manage your device(s), click on the link and enter a valid email address and password. The token should automatically appear in the correct field for you. After submitting the form, an email will be sent to you with a link to your new remote management account to log into. If you don't see the email check your spam folder. Click on the link to log in and then bookmark it.
Troubleshooting
[document troubleshooting]